
Overview
The Single-Row Export by Group Identifier provides a flexible way to export group survey response data from the Impact Suite.
Unlike traditional survey exports, this export is designed around submission-level reporting and operational workflows. Most non-matrix survey data is consolidated into a flat worksheet, making it easier to:
- filter and sort responses in Excel,
- combine data with external systems,
- review identifier-level submissions,
- troubleshoot missing responses,
- and export uploaded media files.
This export also includes advanced options not available in other export types, including:
- downloadable Media Upload ZIP files,
- contextual explanations for missing data,
- optional group profile data exports,
- and flexible identifier-level reporting.
Matrix and goal tracking responses continue to export into supplemental worksheets to ensure complete access to all submitted data.
Access Single-Row Export By Group Identifier
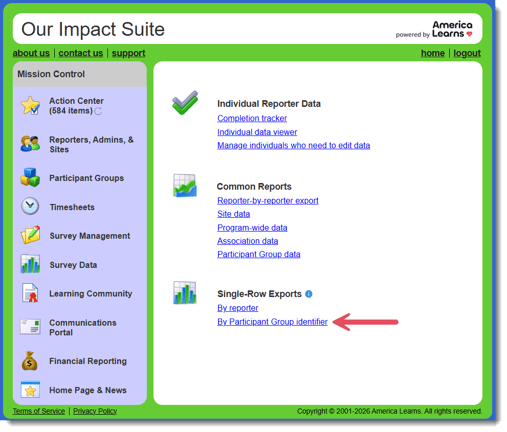
- On the left, in your Mission Control, click Survey Data.
- On the right, under Single-Row Exports, click By group identifier.
Step 1: Choose Your Data
You can pull your export data in two ways:
- By Form Name
- By Questions
Option 1: By Form Name
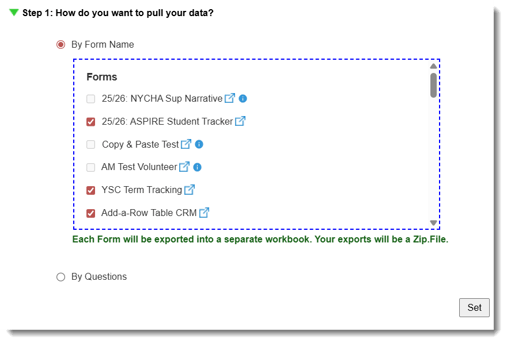
Use this option when you want to export all applicable group data from one or more forms.
-
- Select By Form Name.
- Choose one or more forms.
- Click Set.
Only forms containing group-facing questions will be selectable.
Forms that contain only reporter-facing questions will appear unavailable because they do not contain applicable group data.
If you select multiple forms:
-
- each form will export into a separate workbook,
- and data from different forms will not be combined into a single workbook.
Option 2: By Questions
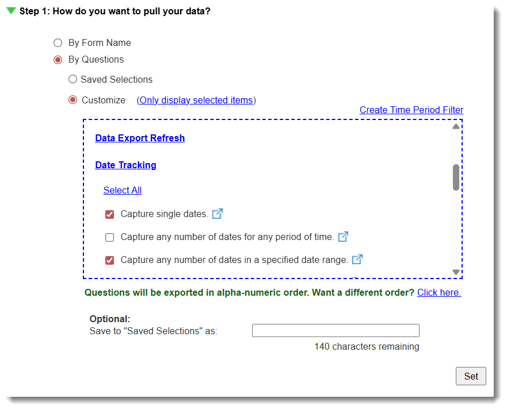
Use this option when you want to export specific survey questions across forms.
-
- Select By Questions.
- Click Customize.
- Select the questions you would like to include.
- Enter a name for your saved selection.
- Choose whether the saved selection should be:
- available only to you,
- or available to all staff with access.
- Click Save.
- Click Set.
Saved question selections can also be reused in other report types.
Step 2: Select Groups and Identifiers
Choose which groups and identifiers should appear in the export.
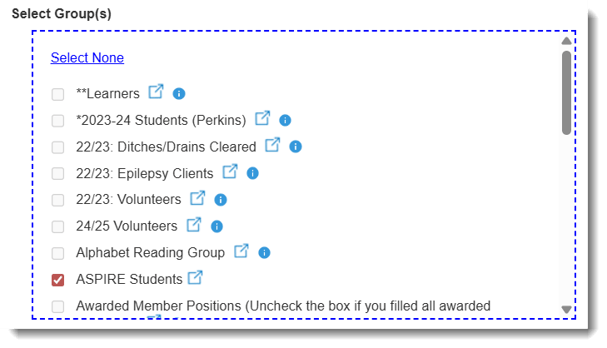
Select Groups
-
- Choose one or more groups.
- Click Set.
Only groups associated with the selected forms or questions will appear.
You can also click the group icon to preview a group before selecting it.
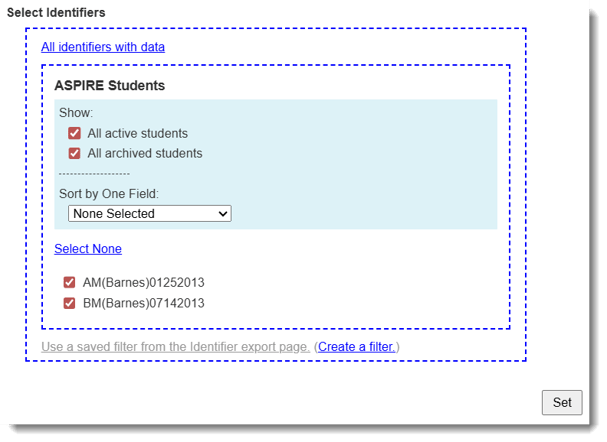
Select Identifiers
After selecting groups, choose which identifiers should be included.
Options include:
-
- Active identifiers
- Archived identifiers
- Individual identifier selections
You can also:
-
- sort identifiers by a selected field,
- or apply filters from the identifier search page.
-
- Make your identifier selections.
- Click Set.
Step 3: Select a Date Range
You can export data:
- by Launch Period,
- or by Date.
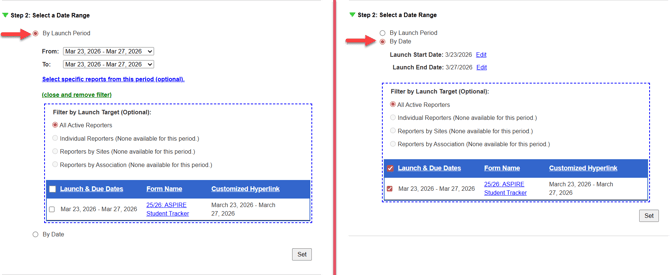
Option 1: By Launch Period
-
- Select By Launch Period.
- Use the From and To drop-down menus to select your launch range.
- Optional: Click Select specific reports from this period to choose individual launches.
- Click Set.
Only launch periods associated with the selected forms or questions will appear.
Option 2: By Date
-
- Select By Date.
- Choose your start and end dates.
- Click Set.
Only launch dates associated with the selected forms or questions will appear.
Step 4: Choose Export Options
Step 4 allows you to customize how your export behaves.
You can:
- apply missing-data highlights,
- include group profile data,
- export Media Upload files as ZIP files,
- or save your export configuration for reuse.
Option 1: Use a Saved Export Option
Use a previously saved export configuration.
-
- Select Use a Saved Export Option.
- Choose your saved option.
- Click Set.
Option 2: Customize
Use this option to create a custom export configuration.
Missing Data Highlights
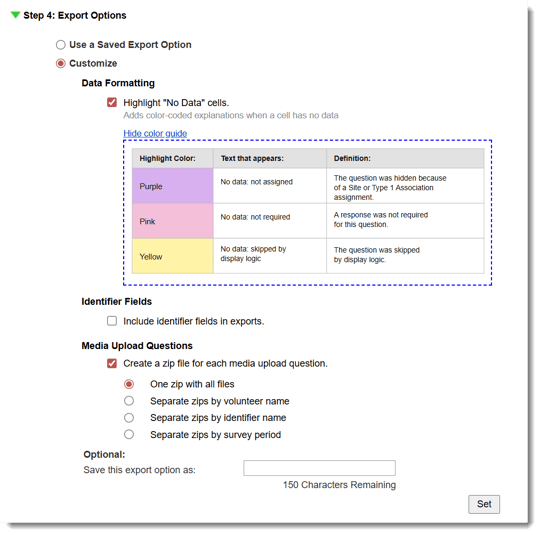
You can apply color-coded highlights that explain why data may be missing from a response.
Enable:
- Add highlights to cells when there is no data
These highlights help reduce confusion when reviewing exported survey data.

Include Group Profile Data
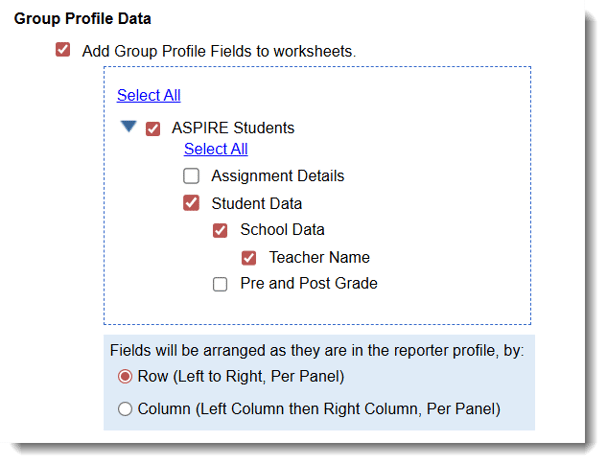
You can include group profile fields directly in the export worksheets.
- Enable:
- Add Group Profile Fields to worksheets
- Choose the standard or custom profile panels and fields to include.
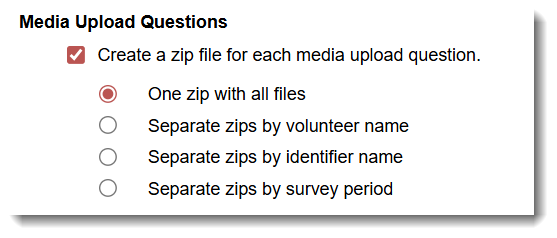
Export Media Upload ZIP Files
Single-Row Exports are the only survey exports that allow Media Upload question responses to be exported as downloadable ZIP files.
Enable:
- Create a Zip.file hyperlink for each Media Upload Question
You can organize ZIP files:
- by file name,
- by reporter name,
- by identifier name,
- or by launch period.
Organizing by identifier name is especially useful when reviewing uploads tied to specific group records.
Save Your Export Configuration
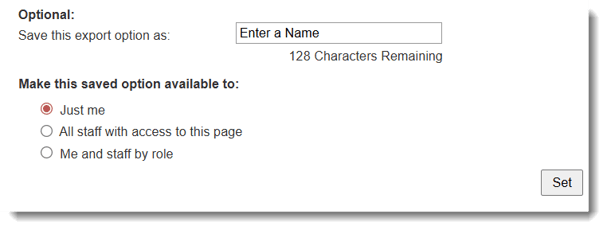
To reuse your export setup later:
- Enter a name in:
- Save this export option as
- Choose who can access the saved option.
- Click Set.
Saved export options can simplify recurring reporting workflows.
Run the Export
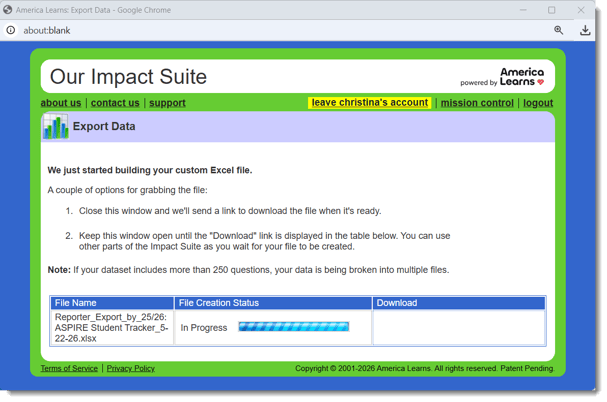
Once all steps display green checkmarks:
- Click Export to Excel.
- Wait for the export window to appear.
You can:
- wait for the download link,
- or close the window and receive an email notification when the export is ready.
Understanding the Export Workbook
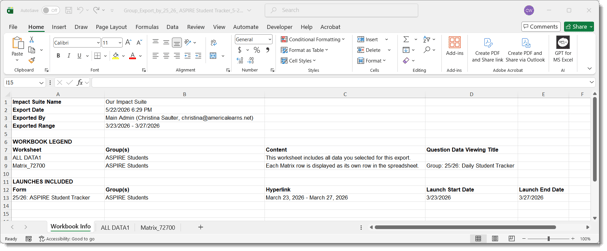
The export workbook includes several worksheets depending on the data included.
Workbook Info Worksheet
The Workbook Info worksheet provides:
- export date and time,
- exporter name,
- export range,
- included forms,
- included launches,
- included groups,
- worksheet definitions,
- and workbook metadata.
This worksheet replaces the traditional export legend.
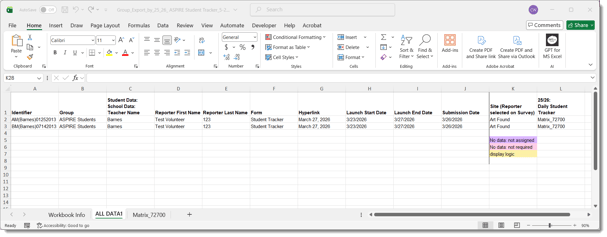
All Group Data Worksheet
The primary export worksheet contains:
- one row per identifier,
- associated group response data,
- reporter information,
- launch dates,
- submission dates,
- and optional group profile data.
Missing-data highlights and media upload hyperlinks also appear here.
Matrix Worksheets
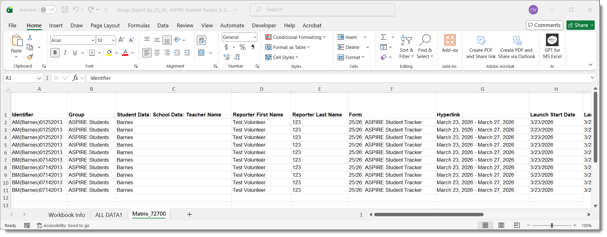
Matrix question responses continue to export into separate worksheets.
Each matrix question receives its own worksheet.
Missing-data highlight logic also applies to matrix worksheets.
[Insert Screenshot – Matrix Worksheet Example]
Show a matrix worksheet with missing-data highlights visible.
Goal Tracking Worksheets
Goal tracking questions export into their own dedicated worksheets.
These worksheets may include:
- goal values,
- status information,
- progress updates,
- narrative responses,
- and associated metadata.
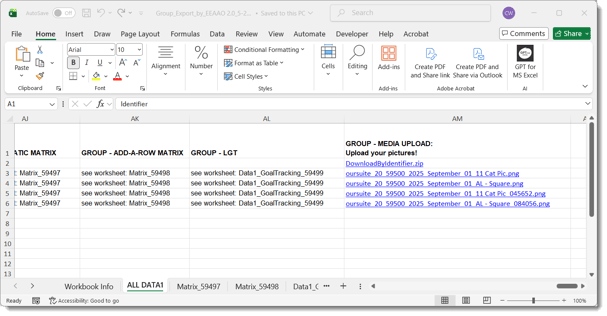
Media upload hyperlinks may also appear in goal tracking worksheets if Media Upload questions were included.
Media Upload ZIP Files
If Media Upload ZIP exports were enabled:
- hyperlinks will appear in the export workbook,
- and selecting a hyperlink will download the ZIP file.
ZIP files may contain:
- uploaded photos,
- documents,
- videos,
- or other uploaded media files.
Tips
- Only forms containing group-facing questions can be selected.
- Selecting multiple forms creates multiple workbooks.
- Identifier-level exports are especially useful for operational tracking and audits.
- Use missing-data highlights when troubleshooting skipped or hidden responses.
- Media upload ZIP exports may take longer to generate for large datasets.
- Goal tracking questions automatically export into dedicated worksheets.