
Build Custom Report
To report on all data tied to a Timesheet Template, you can create a Custom Report. There are four report types available — Totals, Timesheet Period, Monthly, and Daily — each offering a different way to break down your data over time.
Custom reports are highly flexible, allowing you to include only the data you need, whether that’s specific timesheet metrics, selected reporters, or relevant reporter profile information.
Here's how to build a Custom Report:
- On the left, in your Mission Control, click Timesheets.
- On the right, select either View program-wide data or View site data.
-
On the next page, choose the relevant Timesheet Template.
-
At the bottom of the page, select Build Custom Reports.

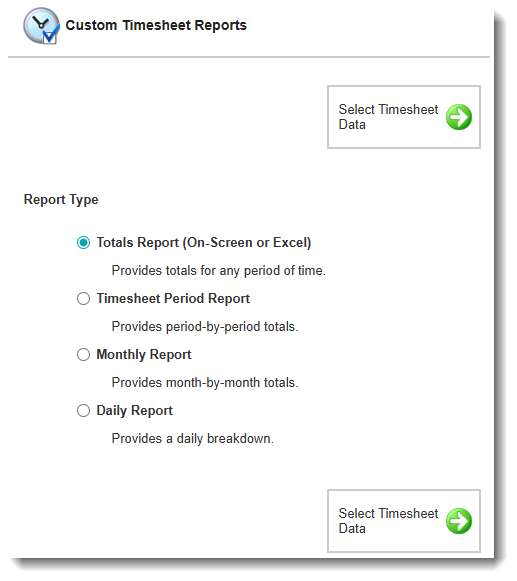
- On the next page, select the type of report you want to build. The following section explains each report type in more detail.
-
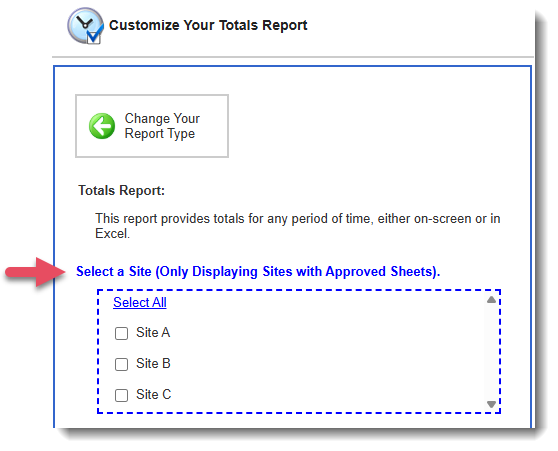
If you selected View site data in step 2, you’ll be prompted to choose the site or sites you’re assigned to. If you selected View program-wide data in step 2, this step will be skipped.
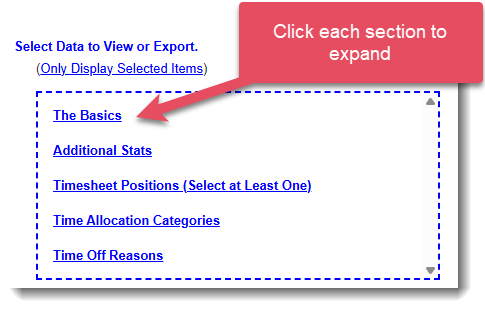
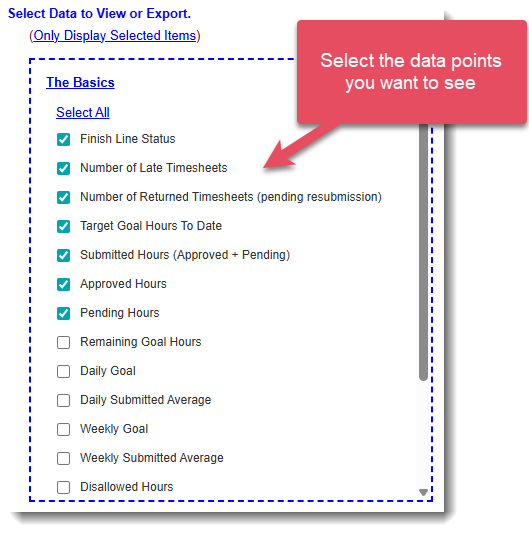
- On the next page, Select Data to Export. You can choose as many data points as you’d like.
- Under Select Site Breakout Options, choose what site data (if any) you would like to include.

Your options are:- Do not include site names - No column will display site-level data.
- Include site names (no breakouts) - All data for each reporter appears in a single row, with each site separated by “;;”. Use this option when you want to see where the reporter served each day, without tying specific hours to specific sites.
- Include site names (breakouts). - A separate row is created for each site where a reporter served. Use this option when you need to see the exact hours the reporter recorded at each individual site.
- Under Select One or More Reporters, choose which reporters you’d like to include.

Your options are:- Include all relevant reporters.
- Select specific reporters.
- Include all relevant reporters.
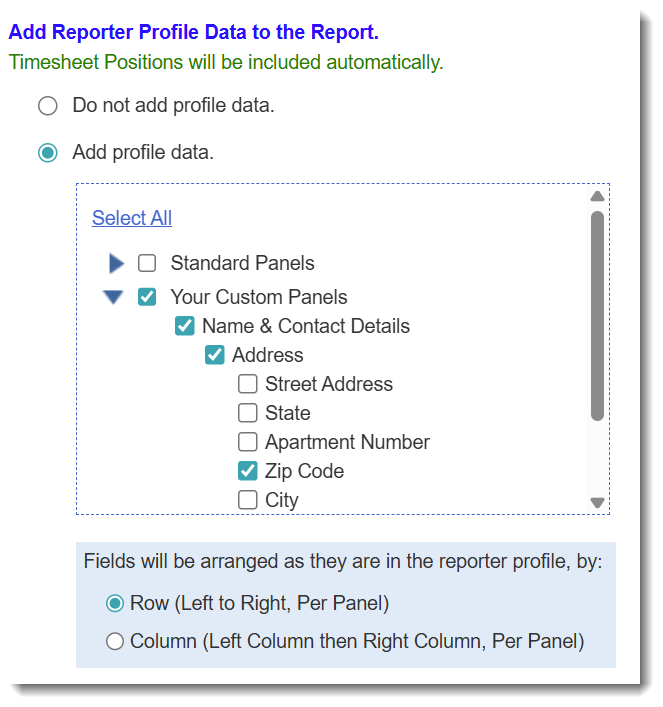
- Under Add Reporter Profile Data to the Report, select any reporter profile fields you’d like to include.

Your options are:- Do not add profile data.
- Add profile data. - Choose any number of Standard or Custom fields to include.
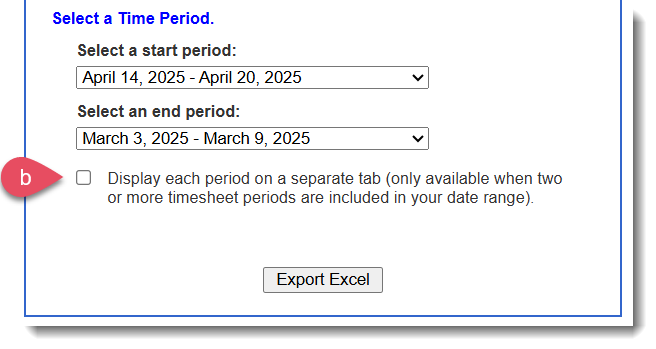
- Use the Select a Time Period section to select the time period that the report should include.
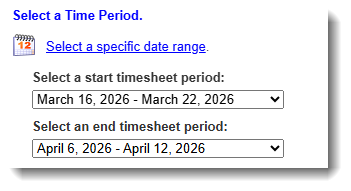
NOTE: For the Totals, Timesheet Period and Daily report types, each date range in the drop-down menu (e.g., May 6, 2026 – April 12, 2026) represents a single timesheet period. For the Monthly Report you will only see each month listed.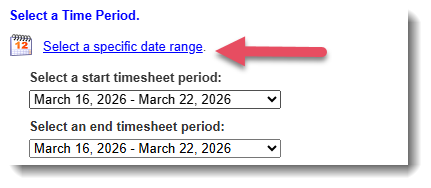
TIP: For Totals and Daily report types, you can click Select a specific date range to enter exact dates instead of using timesheet periods. - There are two special options for the Totals & Timesheet Period report types.
- This option is only available for the Totals report type - When selected, your report will include the status, date, and timestamp for: (1) The most recent time each reporter submitted the relevant timesheet, and (2) The most recent time a supervisor or program staff member approved or partially approved that timesheet.
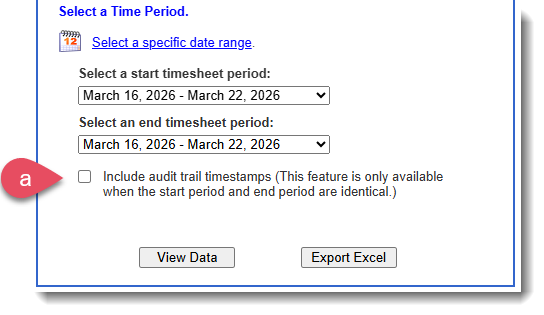
- This option is only available for the Timesheet Period report type - When selected, your export will place each timesheet period on its own worksheet in Excel, so you can review periods one at a time instead of side by side.
- This option is only available for the Totals report type - When selected, your report will include the status, date, and timestamp for: (1) The most recent time each reporter submitted the relevant timesheet, and (2) The most recent time a supervisor or program staff member approved or partially approved that timesheet.
- Choose your report format by clicking View Data in an on-screen report or Export Excel.

NOTE: View Data option is only available for the Totals Report.
Custom Timesheet Report Types & Export Options
| Description | Data to Export Options |
ALL Report Types |
The Basics
Timesheet Positions
Time Allocation Categories
Time Off Reasons
|
Totals ReportUse this report to export summarized timesheet data either to date or for a specific time period you select. NOTE: Some fields are always calculated as totals to date, even when a specific date range is applied. This includes fields such as Finish Line Status and Daily Goal. |
The Basics
Additional Stats
|
Timesheet Period ReportUse this report to export timesheet data by timesheet period. You can choose to display periods side by side on a single Excel worksheet, or place each selected period on its own tab. |
Audit Trail
|
Monthly Timesheet ReportUse this report to export timesheet data by month. You can choose to display months side by side on a single Excel worksheet, or place each selected month on its own tab. |
No additional data to export options exist for this report type. |
Daily Timesheet ReportUse this report to export day-by-day timesheet details for each selected timesheet period either organized by reporter or by date. The system generates an Excel file with a separate tab for each timesheet period you choose to review. |
|